Assalamo aleikum,
Here are some instructions for how Islamic Centers can effectively hold online programs for their community members.
The coronavirus has forced many of our centers to cancel their programs, just when their communities need them the most. iA these steps may help those centers provide some of their services. These recommendations are based on lessons learned while organizing online tafsir classes at why-quran.org over the past four years.
You’ll find five different stages below, starting with the easiest one to implement, which will let you quickly start offering programs.
They’re all designed to let you conduct programs while everyone remains in their own homes, including the scholar and the tech team (if any).
Each stage builds upon the previous one, gradually becoming more complex but also offering you something better in return (e.g. ease of use for your community, interactive lectures, higher quality recordings). You can stop at whichever option you’re most comfortable with.
Stage 1: Speaker streams directly to YouTube
This is the easiest way to get started
What this gets you:
- A scholar can stream a video of himself live over YouTube
- Recording is automatically available on YouTube (if you want it to be)
What you’ll need:
- A YouTube account
- A laptop with a webcam
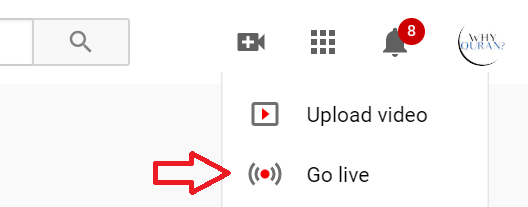
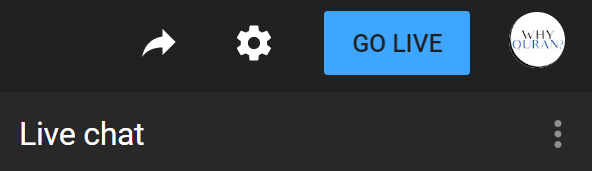
Give the speaker the username and password for your center’s YouTube account (if you don’t have one yet, they’re free to create). When it’s time to start the lecture, the speaker will need to go to youtube.com, log in with the YouTube account, and click on the camcorder icon on the top right corner of the window, and then click on “Go Live”
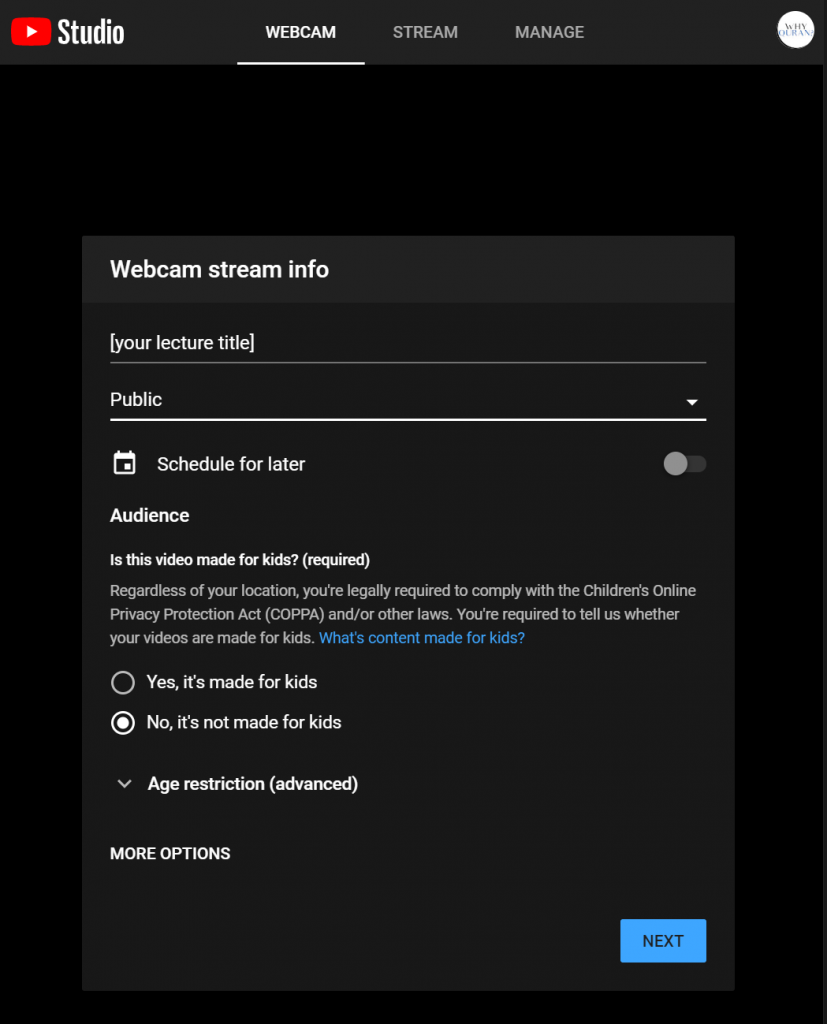
On the page that it takes you to, click on the WEBCAM option:

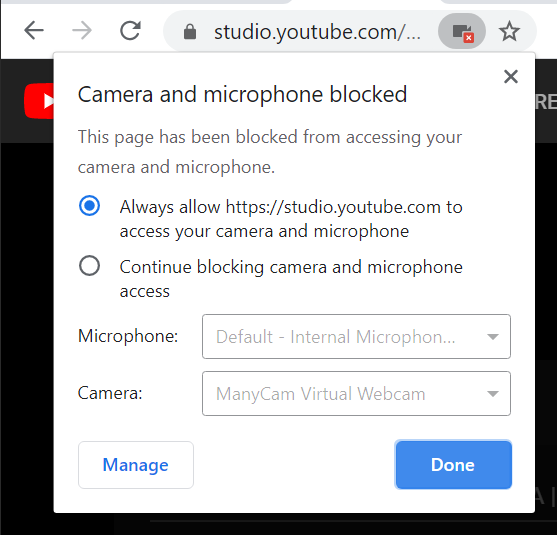
You may see a message about allowing YouTube access to your camera and microphone. Let it have that access.
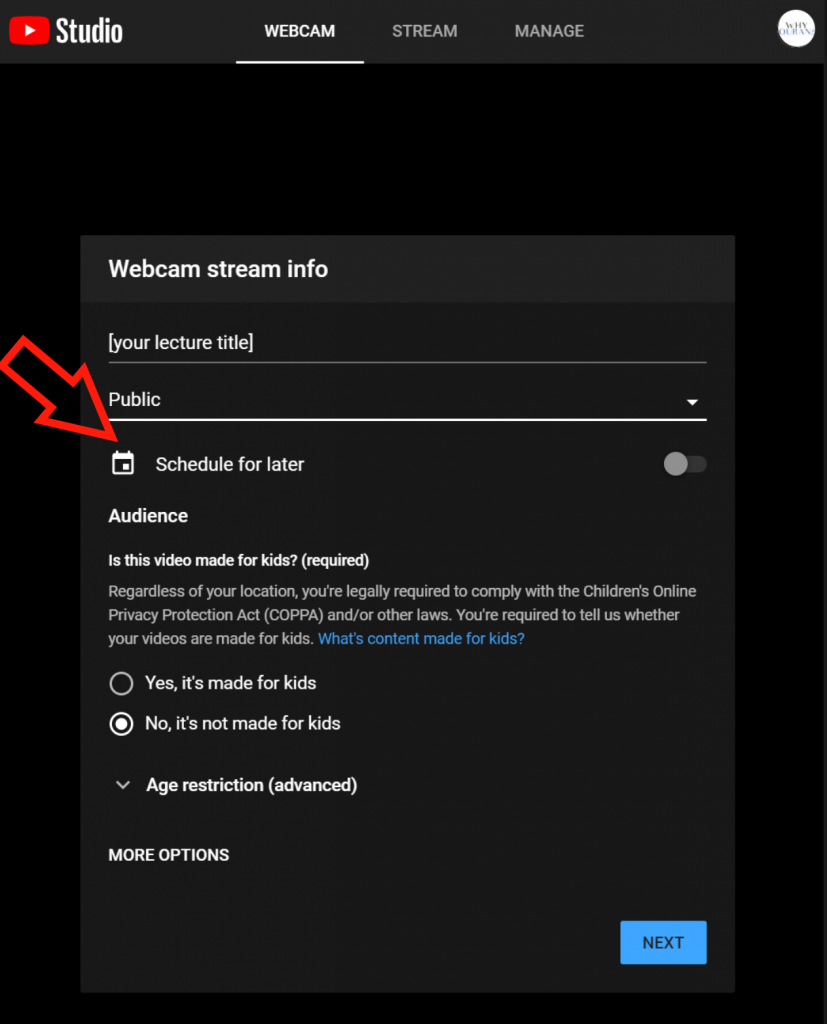
Now you can setup the lecture and give it a title. Set your privacy level to Public.
You’ll also want to select the button that says “No, it’s not made for kids.” Please understand, this doesn’t prevent kids from watching it. Saying ‘yes’ means you’re making a program specifically intended *only* for kids, and it forces you to comply with other legal requirements. Most masjid programs don’t fall under that category.
When you click next you’ll see a preview of your lecture. Click “Go Live” to start broadcasting the lecture publicly
How can other people find the lecture? You have two options
Option 1: If you click on the arrow at the bottom of the page then you’ll see a url that will take people to the correct YouTube page. You can share that link with others
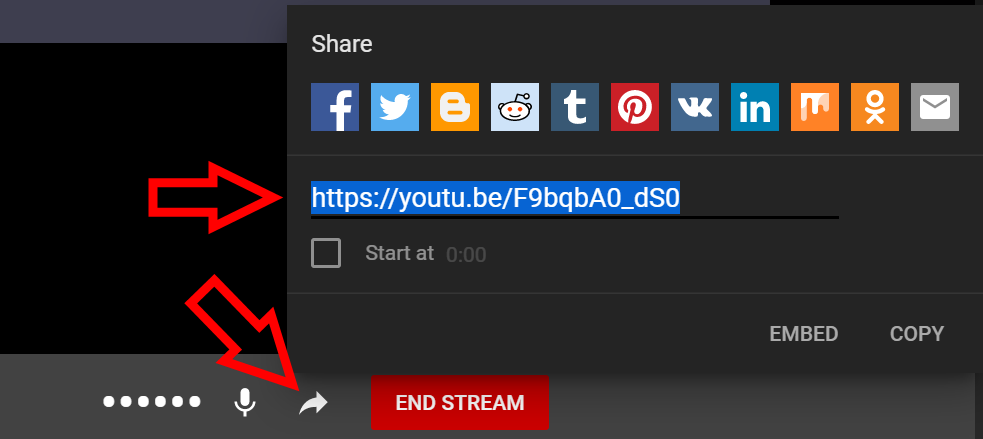
The downside here is that you have to wait until the livestream starts before you can share the link with anyone.
Option 2: Share your YouTube channel url with people. The livestream will become visible there once it starts.
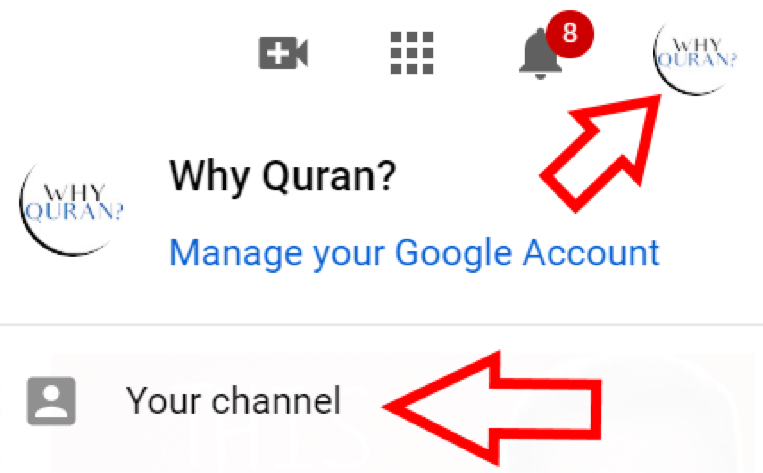
You can get your YouTube channel url by clicking on your account logo on the top-right corner of YouTube.com, right clicking “Your Channel”, and clicking “Copy link address”
When you’re done giving the lecture, click the “End Stream” button at the bottom of the page
Stage 2: Share the Lecture in Advance
Why would you want this?
- By getting the link before the lecture actually starts, you community can find the lectures more easily. They could receive the link days in advance, making it much easier for them to watch the lecture.
This is exactly the same as Stage 1, except you’ll do the steps before the lecture time and and clicking “Schedule for later.” That’ll let you set a time in the future when you want your lecture to actually start and will give you a link where the livestream will be viewable. You can share that link with your community, making it much easier for them to find the lecture.
When it’s time to start the lecture click “Go Live” and the Live Stream will begin and be automatically recorded. When you’re done with the lecture click the “End Stream” button at the bottom of the page.
Stage 3: Multiple Speakers
What this gets you:
- You can have multiple people talk during the live stream and see your audience, making it more interactive. For example, some people can recite marsiyas/nohas, or there can be a Q&A
- Easier setup for the scholar. Technical work gets shifted from the scholar to another person who’s willing to take responsibility for setting this up.
- Zoom will automatically record the lecture
Downsides:
- It’s not free, and the cost depends on how many people you expect to join your live stream:
- It costs $15/month to have up to 100 people
- It will cost $200/month to have up to 500 people
- More than 500 people is not possible
- Your video will not automatically be streamed to YouTube. You’ll have to upload it there manually later
This step is pretty simple. Register for a Zoom.us account and buy their Pro plan (or the Business plan if you expect more than 100 participants).
Follow the instructions to create your meeting, and then share the meeting link with your community before the class starts.
This time, the scholar doesn’t have to do anything themselves. Someone else can create the zoom meeting and send them an invitation to join the meeting.
Stage 4: Large Audience at a Cheaper Cost
What this gets you:
- All the benefits of the previous steps and…
- No limit on the number of participants
- Your video gets automatically streamed and recorded to YouTube
- This is a cheaper way to stream to more than 100 people than Stage 3 (using the same $15/month instead of $200/month)
Downsides:
- A little bit more of a technical setup, but not too much more difficult.
In this setup, we first follow the steps in Stage 2 to schedule a live stream via YouTube, then we use Zoom to setup a webinar, connect the Zoom webinar to the YouTube livestream, and stream the Zoom webinar over YouTube.
On your Zoom.us plan, add the the webinar add on
Create a recurring meeting on Zoom. You can select anything for the date and time, Zoom won’t make you stick to those times (I make this a recurring meeting). Then click ‘Save Meeting’
Follow the steps on this page to enable Live Streaming the meeting to YouTube. Specifically, you want to enable streaming to a Custom Live Streaming Service (which would be YouTube in our case). So you’ll want to follow the steps under “Streaming a Meeting or Webinar to a YouTube Event” to be able to stream to scheduled events. Note that while it is possible to stream to YouTube without setting up the Custom Live Streaming Service, you’ll not be able to schedule a class in advance (so you’ll loose out on the benefits of Stage 2).
After reading the instructions linked to above, if you’re confused about where to enter the stream url and key (that part of the instructions isn’t very clear), go to your meeting’s page on Zoom and scroll down to the bottom of to see the Live Streaming options
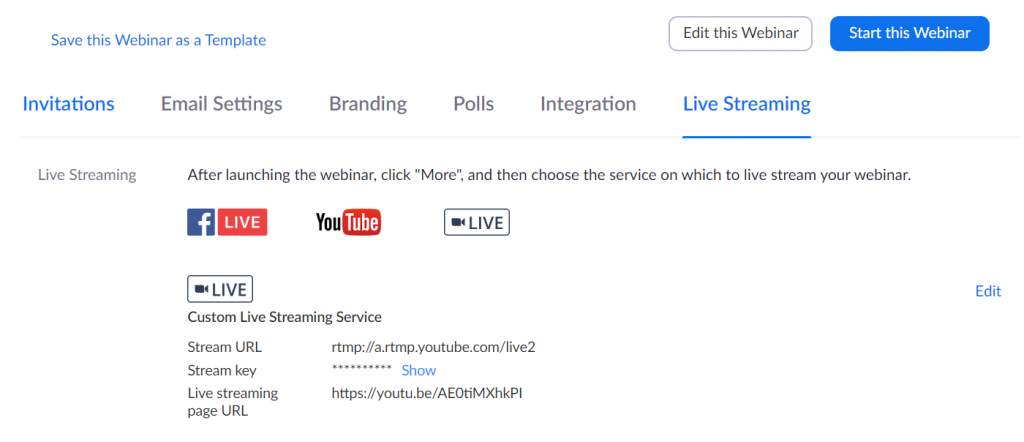
Click “configure live stream settings”. That’s where the information should go

To share the link to this lecture with others, you’ll want to share the YouTube stream URL (the same one you shared in Step 2). The Zoom webinar is limited to 100 people, so you can’t have too many people join that at once. They would also have to install Zoom to make it work, making it harder for them
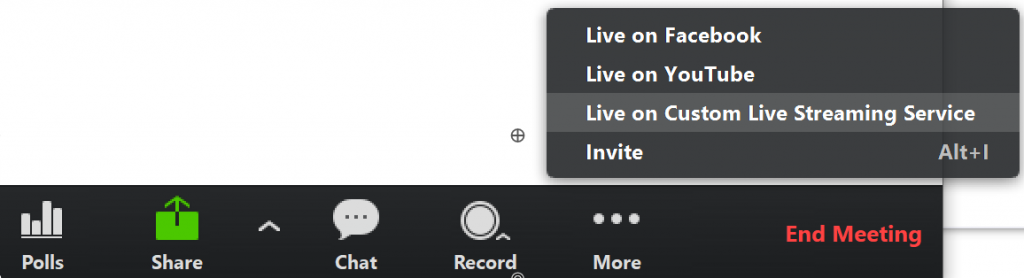
When it’s time to start the lecture, the Zoom host and speaker should both join the Zoom meeting and the host should specify “More->Live on Custom Live Streaming Service”.
Then go to the YouTube studio page for the stream and click “Go Live” to actually start streaming.
Additional options to improve the broadcast:
- If you want to make sure only the speaker’s video is shown, in your Zoom meeting right click on their video and click “Spotlight video”. That will ensure only their video (and no one else’s) gets sent on the broadcast.
- To stop the speaker’s name from showing up on the bottom left corner of the stream, rename their name to just be an empty space (” “)
Stage 5: Get Higher Quality Recordings
What this gets you:
- Higher quality video recording. The livestream is unaffected, but you can upload a higher quality video to YouTube later
Downsides:
- High Complexity: you need to setup the main speaker’s laptop to support this setup
- Only the main speaker’s video can be seen (though other people can still talk)
- You need to upload the recording to YouTube manually (since we’re recording a higher quality video on the speaker’s laptop)
Why would I want this?
The recordings created by the previous stages are good, but live streamed video tends to be lower quality than normal recordings. And if at any point the internet connection weakens then the video or even the audio can cut out for a few seconds. That’s bad enough during a live stream, it feels even more jarring when someone is watching a recording!
This step will show you how to simultaneously stream the Live Stream while also recording it to your computer at a higher resolution. That way you’ll have a video with a much better quality recording that you can upload later on.
So how do I add it?
We keep the exact same setup that we had in Stage 4, but add some extra software to also record the lecture locally.
To do this we’ll need to use a free program called Open Broadcaster Software (OBS). You can download it from https://obsproject.com. We will only use it to record the lecture in HD. We’ll continue to use Stage 4’s Zoom + YouTube setup for the actual live stream.
You’ll want to install OBS on the main speaker’s laptop. If you can’t visit them in person, you can use Zoom to have a video chat with them and ask them to share their desktop. Request to control their desktop remotely and install & configure OBS.
You can find multiple videos on YouTube for how to setup OBS for recording (you could try skimming this one for the important parts). You’ll want to set your video output to be at a 1080p resolution and video format to .mkv.
Also, note the Recording Path setting. We won’t set this right now, but you’ll come back to this setting a few steps later so remember where you saw it.
Once you have OBS setup to record the video, right after connecting to the Zoom lecture the lecturer will need to click the “Start Recording” button on OBS to start recording locally, and then click “Stop Recording” once the lecture is complete.
Now your speaker will need to either upload the lecture to YouTube, or put it on a service somewhere that the people doing the video editing can access it. Following the principle of “make it as simple as possible for the speaker”, ideally the the speaker should have to do nothing.
Instead, you can install a cloud storage program like OneDrive or Dropbox to their laptop, create a shared folder that both the speaker and tech team have access to, and set that folder as OBS’s Recording Path (remember that setting I asked you to note?). This way any new lecture will automatically be come available to the rest of the team. (Be sure the account which owns these shared folders has sufficient storage space on it).
Want even better quality recordings? Upgrade your speaker to a higher quality, 1080p webcam. It’ll make a big difference at this stage.
One Important Extra Step if your Speaker is using a Windows laptop
Mac users can skip this section. There’s one extra problem with Windows laptops: by default their webcam can only be used by just one program. So it’s either OBS or Zoom. But we want to use both, that’s how we get both local recording and live streaming.
To make this work download and install a free software called ManyCam, available at manycam.com. This will give your computer a virtual webcam that can be shared by multiple programs. Set this as the video source for both OBS and Zoom
Stage 6: Upgrade to an even Higher Quality Camcorder
The general idea is to take a professional quality camcorder and turn it into a webcam for your laptop, which will require using a hdmi video capture card.
This is something we’re experimenting with right now. I’ll update these instructions once I get this setup to work successfully.
Stay tuned
Conclusion
These are multiple options that you can utilize based on your level of technical knowledge. You can start off easily by adopting Stage 1, and gradually go on to the next stage as you feel it’s needed.
If you get stuck or have suggestions to improve these methods, please reach out! You can share questions/comments below or send me an email at tech-support@why-quran.org and I’ll do my best to help out.
Iltemase dua
The form you have selected does not exist.